Arctical Logo White
Leather for Outdoor, Knives and EDC.

This Beginner’s Guide to leathercaft will help you to avoid the common mistakes. It will teach you about equipment, stitches and edge treatment and how to sew leather. So let’s get started.

Beginners Guide Leathercraft EN Preview

What does it cost to start leather working?

First of it costs about 50€ to begin with leathercraft. But there is no upper limit. The following sections will teach you to avoid the beginner mistakes, but experimenting is part of the game. When I started I bought some scrap leather parts on ebay and used needles and tools I had in the house. Later I realized why people used which tools and which were there to safe a lot of time.

Quickstart Guide

How to sew leather? By hand.

To sew leather you need two needles, thread, leather and something to prepare holes e.g. hammer and nail and maybe a ruler. After that, it is best to follow these steps for hand sewn saddler stitch:

How to Saddle Stitch?

Saddle Stitch Hole Punching

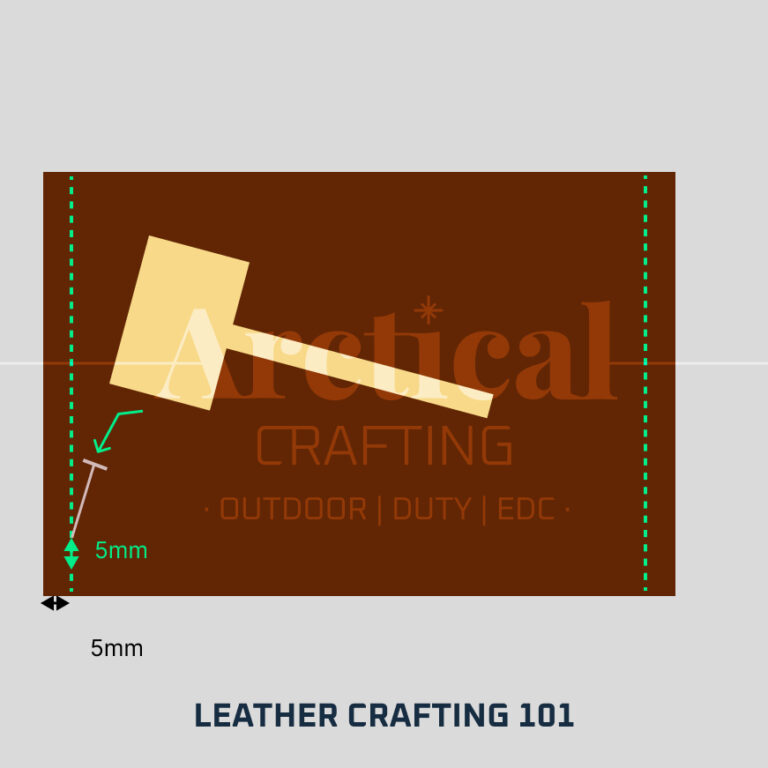
Punch Stitching Holes

Punch the stitching holes with a hammer. Try to keep a distance of 5mm between the holes and the edge.

Saddle Stitch Start Thread

Threading the yarn to two needles

Thread the yarn through two needles. For the length of the thread, you can use 4-6x the distance of the seam as a rule of thumb. Then bring the two seam holes that you want to connect, one above the other. Now poke the needle through both holes so that the same length of thread hangs on both sides. For simplicity, these are differentiated by color here. You usually sew from the top down or towards you.

Saddle Stitch Left Trough

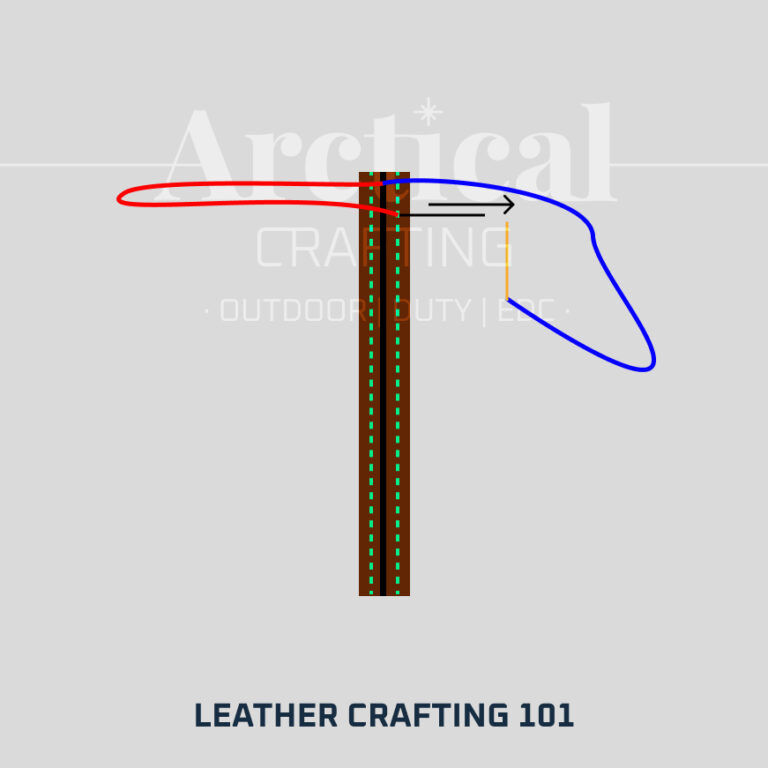
Pierce through the second hole from the left

Now poke through the next hole from the left, but do not pull the thread tight yet.

Saddle Stitch Cross Needles

Place the right needle under the left needle

Now cross both needles.

Saddle Stitch Right Behind

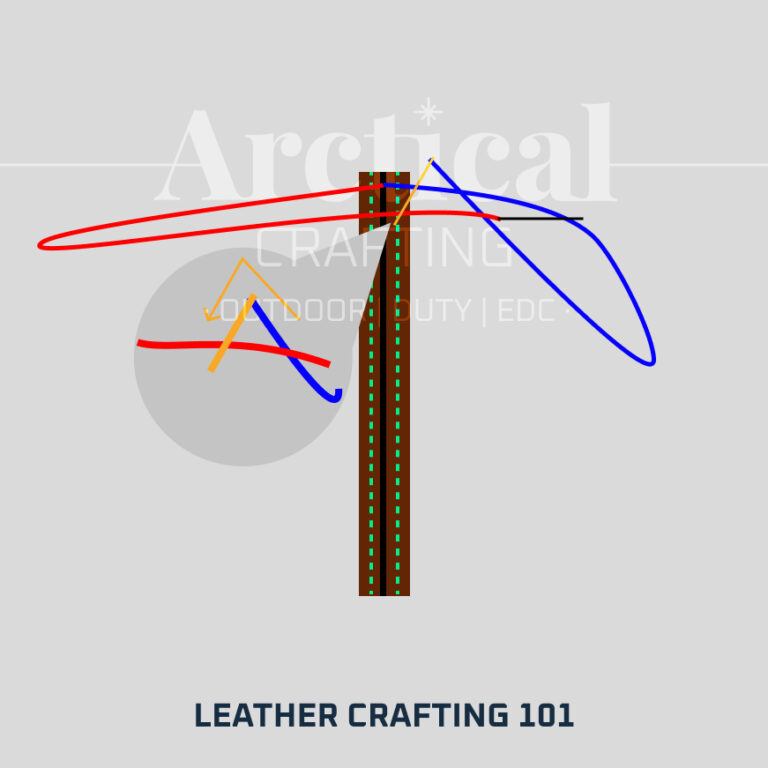
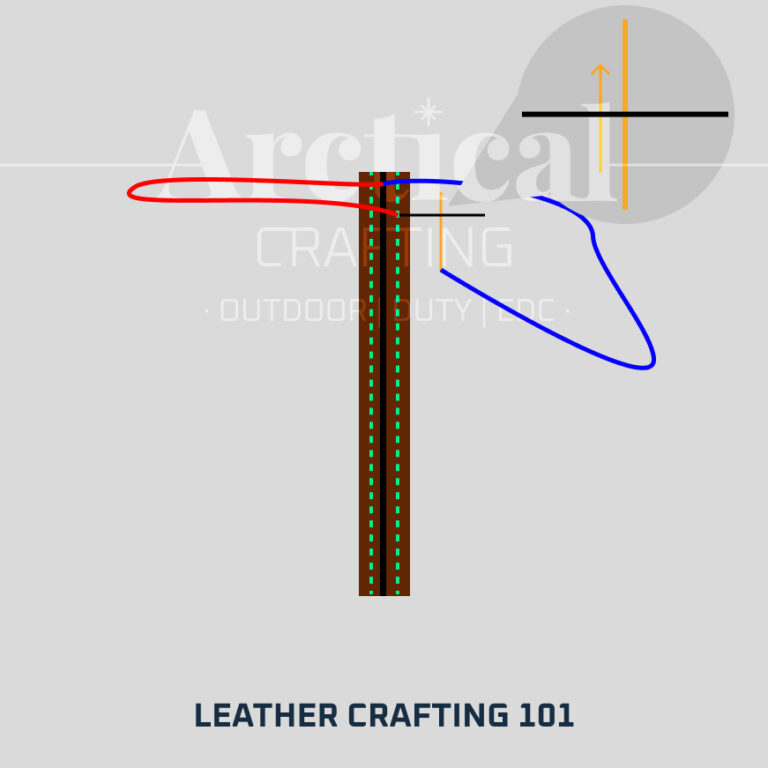
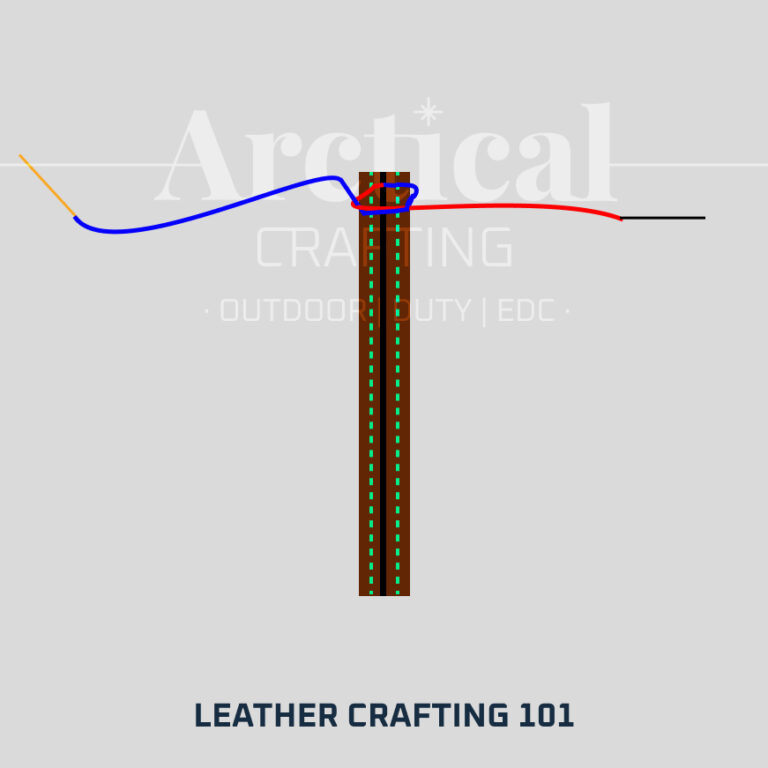
Pierce the seam hole from the back

Now pull the left needle (in the cross position) through completely, but not yet tight. Then turn your right hand so that the other needle is on top. Now pierce the seam hole from behind with this needle so that the right thread (blue) lies on the left thread (red).

Saddle Stitch Bring From Right To Left

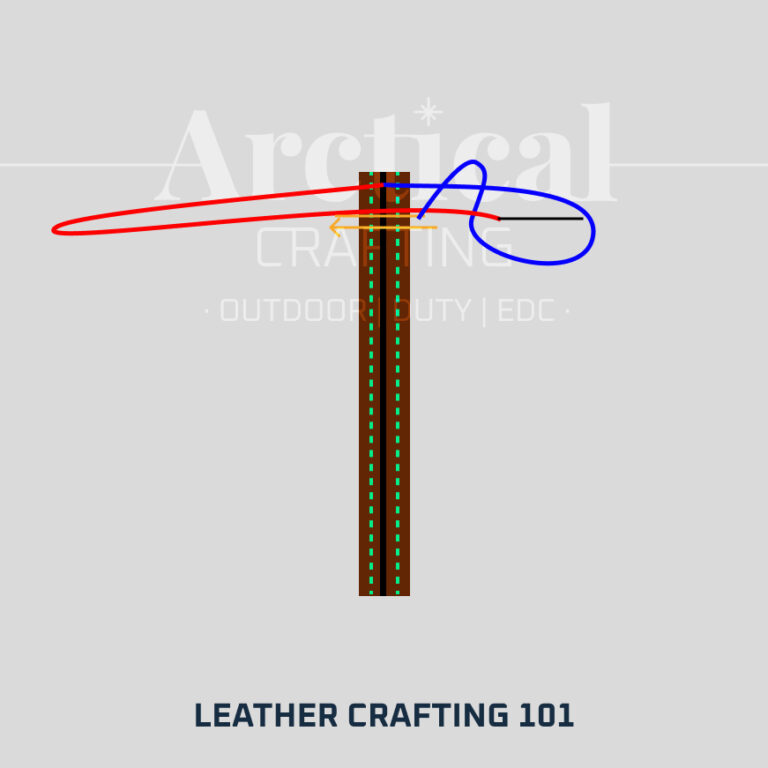
Pull the needle through from the right

Bring the needle through the hole, but be careful not to pierce the other thread.

Saddle Stitch Bring Through Loop

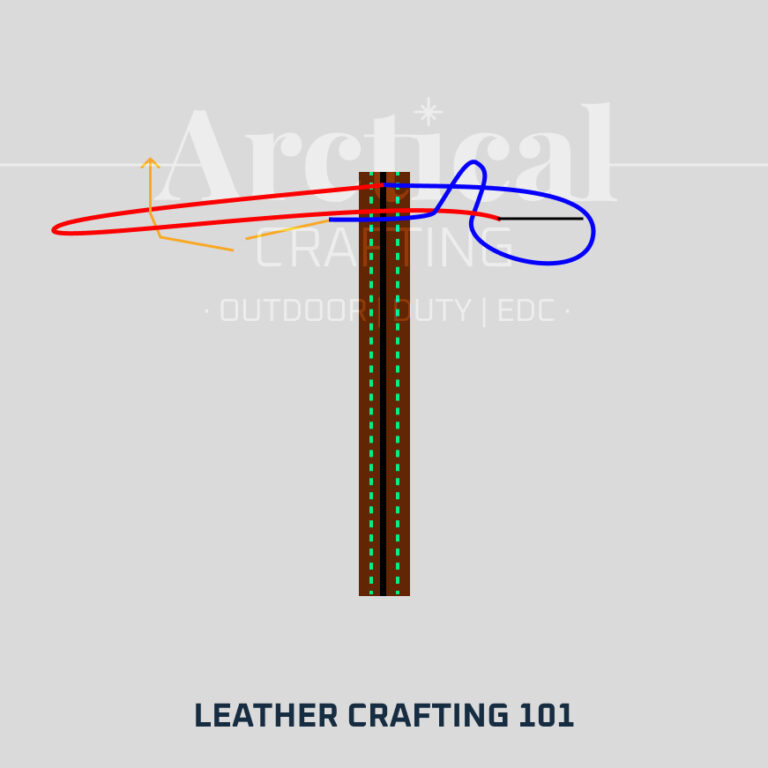
Thread the yarn through the loop from below

The now left thread (blue) must now be brought through the loop of the other thread (red) from below. This forms a knot in the seam hole.

Saddle Stitch Pull After Loop

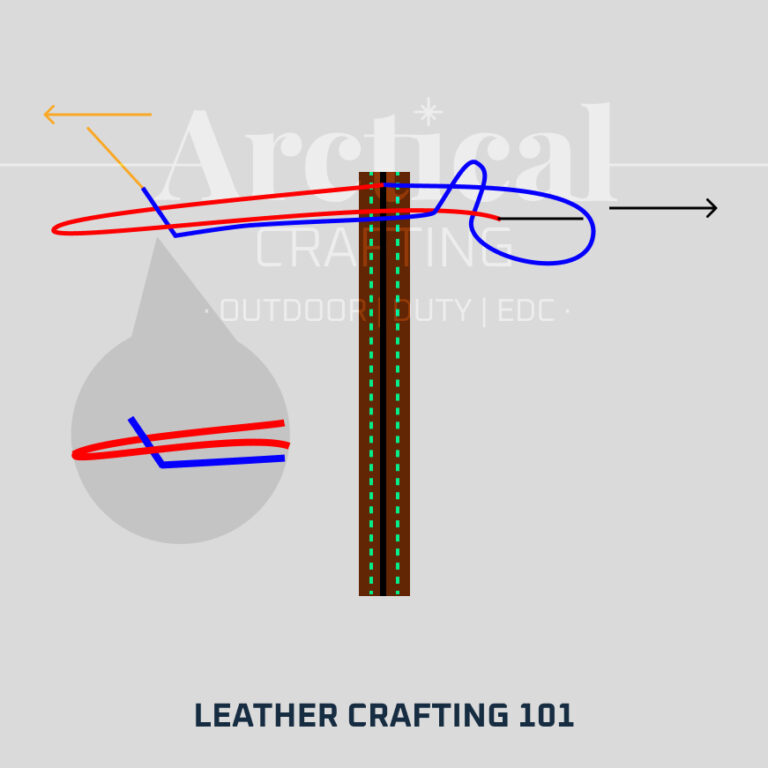
Now pull both sides tight

Your first saddle stitch is now almost complete. Now pull on both sides.

Saddle Stitch Complete

Done. Now repeat.

Repeat until you reach the end of the seam. When you get there, you should sew back 2 more stitches. To do this, simply turn 180° and sew back towards you. Make sure to always place the thread over the stitch that is already there. This will form a more even seam pattern. Then cut the thread close to the seam hole and seal it with a lighter.
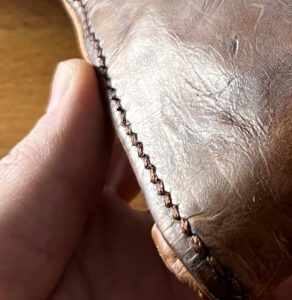
What tools do I need to start leather crafting?

The tools you need to begin leathercraft depend on what you want to build. I would recommend you to start with hand stitching smaller goods. In that case you could start of with the following setup. 

I curated some of them on Amazon. If you want Amazon to buy me a coffee, you can use the following partner links – the price will usually stay the same for you:

* These links are so-called affiliate links. If you click on such an affiliate link and purchase through this link, we get a commission from the online store or provider in question. For you the price usually does not change, but it helps us to finance our content. You can find more information about this at Privacy Policy. When using these links your data will be collected and stored electronically.

Essentials:

Optional Tools:

Colors & Wax:

Are you interested into other materials as well?

Guide – How To Sew Cork Leather?

cork variants
Cork leather as vegan alternative

10 Tips and Tricks for Leathercraft Beginners.

When you want to start leather crafting I would recommend you to consider these 10 tips and tricks to learn faster and realize high quality projects:

  1. Invest in good tools e.g. a sharp knife, but before that get to know what you need.
  2. Get some veg tan leather and get rid of the cheap chrome tan.
  3. Try different stitches e.g. saddle stitch, baseball stitch etc.
  4. Try edge smoothing and edge painting. Try Stamping. Try Braiding.
  5. Use patterns. Try free and paid ones.
  6. Build stuff, try things and make mistakes.
  7. Track your time and adapt.
  8. Watch videos how other people build stuff and learn from them.
  9. Take pictures. Share your work on social media. Get Feedback.
  10. Checkout the leather goods in your surroundings – high and low quality.

The following sections will share a details and tips for your beginner leather projects.

1. Invest in good tools, but before that get to know what you need.

It can be really frustrating to to use cheap or wrong tools. I used a blunt knife for far too long when I started.
It took ages to cut things and the edges were really rough. I used nails to punch stitching holes. I used packaging band as yarn. It was a revelation when I realized there are solutions to my problems.

You do not need 100€ stitching chisels to start. You can begin with a starter kit and later search for a good supplier. Check out what people use on YouTube or ask on Reddit.

2. Get some veg tan leather and get rid of the cheap chrome tan.

Most beginners start with some cheap leather scrap parts. Often colorful and soft chrome tan (tanned) leather is bought. There are some applications for this kind of leather e.g. in furniture building, but for beginners it is hard to work with and the results will not look like, what is expected.

Materials
Recomended: Stiff Veg Tan Leather
chrome tan leather
Soft Chrome Tan Leather

Veg tan (vegetable tanned) leather is often easier to work with, because it is stiffer. Edge treatment is easier and it may also be stamped with punches.

It maybe be a little more expensive, but there are also scrap parts available to try  working with the material.
I recommend you to get about 2mm thick (4-5oz) veg tan. Here is a conversion chart (external link) between mm and oz as well.

3. Try different stitches e.g. saddle stitch, baseball stitch etc.

There are a lot of hand stitches out there. Some are decorative & some serve other purpose. Get to know some of them and practice on scrap parts. This will make you faster and your work more versatile.

Here are some stitches to try:

saddle stitch

The saddle stitch

The saddle stitch is a very robust sewing technique and likely to be your bread and butter method. It is used to put 2 or more layers on top of each other. There are variant including a "knot" inside the hole and some without it. You can identify it by keeping an eye on the slightly tilted sewing image.
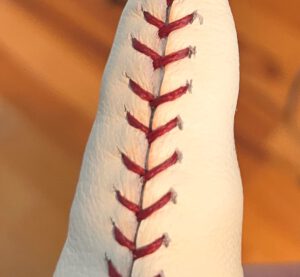
baseball stitch

The baseball stitch

The baseball stitch can be used to pull 2 leather edges towards each other or to wrap an edge. It can be really helpful to tighten edges or wrap tools. Be sure to always sew in the same order - left first or right first.

cross stitch

The cross stitch

The cross stitch can also pull 2 leather edges towards each other or wrap an edge, but it might not be as tight as a baseball stitch. But the cross stitch is a little more decorative.
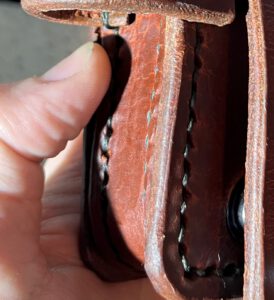
butt stitch

The butt stitch

The butt stitch can be used to sew 90 degree corners or flat surfaces together, but maintain a "saddle stitch" look. To start a butt stitch, you have to use 45 degree stitching holes (trough the edge) on one piece for a 90 degree corner or on both pieces for a flat surface.
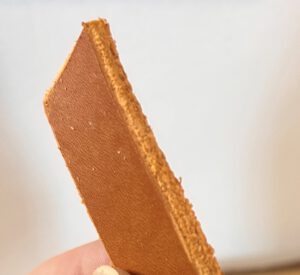
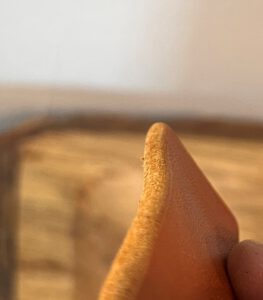
You can find a great guide for hand stitching leather here:

4. Try edge smoothing and edge painting. Try Stamping. Try Braiding.

Sewing leather is just one part of the game. But there are many more things you can do to make your leather projects stand out. When you know how to stitch two pieces together, checkout edge smoothing to get rid of ragged edges. I would say there are 4 levels of edge treatment:

raw leather edge

Beginner

Raw edge with no treatment
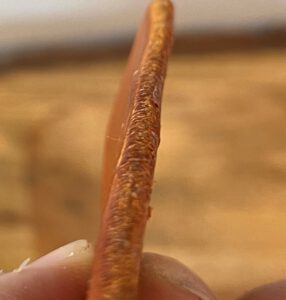
sanded leather edge

Intermediate

Sanded with 400 and 800 grit paper.
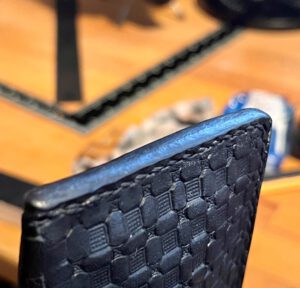
waxed leather edge

Advanced

Like Intermediate + beeswax and burnishing

painted leather edge

Expert

Sanded (400 & 800) with 4-6 layers of edge paint (sanded with 800 after each layer) + beeswax and burnishing

Use some 400 grit paper on the edges until large fibers are gone, then 800 grit paper and then some beeswax and finish it of with burnishing (e.g. with some canvas). Compare the smoothed edges to not treated one and you will see a quality difference. If you add multiple layers of edge paint after the first grit paper and smooth it with 800 after each layer of paint and then apply the beeswax, you will get an even nicer edge.

This will show you what quality differences are out there. But you will notice that not every project needs this kind of treatment or some edges are newer seen.

You can also check out wet molding and stamping to get your pieces into a certain shape or apply texture to it. For other pieces braiding leather can add more details and style to your work.

leather stamped
Leather with texture
leather metal stamps
Leather stamp tools

The stitches, edges, stamping, braiding and so on are the “colors” you can “paint” your leather art with.

5. Use patterns. Try free and paid ones.

Often you start with an idea or purpose for your leather project e.g. building a knife sheath for a new knife you have bought. You have two options now: you can build a custom project or checkout some patterns. You can even modify some patterns. Search for “leather patterns” on Google, Reddit or Etsy. They can also be an inspiration, when you are searching for new projects.

You can print them on paper and then apply them to your leather.

Tip: Check the scaling of your prints. Sometimes the printer will shrink your  templates.

The main benefit is that you will save you a lot of time. It will make your cuts cleaner, the geometries nicer and often the stitching holes are count, so that you do not end up with too many or too few holes.

Leather sewing pattern
Leather pattern in Figma

A few words on paid templates: Often they cost about 5 to 25€ depending on the complexity of the work. When you think about the price, they are the same as a good tool. Try to build a custom wallet for yourself and then try to build one from a template. 

If you want to build your own templates, check out design tools like Figma. They are free and offer many geometry tools and a PDF export.

Note: If you want to sell your work, check for the usage rights of the template, some are not for commercial usage.

6. Build stuff, try things and make mistakes.

The more you build, the better you get. As a beginner in leathercraft try to build the same piece twice or more. First a prototype (intended to be not perfect) and another one which you can apply your learnings to. You will realize which steps you should have done earlier e.g. edge painting complex geometries before sewing or punch holes for buttons earlier.

Trying different projects will also help you to find your own style and preferences. Ask your friends and family if they need something. Is it a wallet, a dog collar, a hip bag or a notebook cover?

Tip: Get inspired on social media. There are a lot of groups, subreddits or Pinterest pins for you to discover.

7. Track your time and adapt.

Leather work can be quite meditative and relaxing, often there is no need to hurry. But if you take a look on what takes you the most time and is the least fun you can discover a need for a new tool or improved techniques. A few inspirations:

  • If your projects take a lot of time adjusting the position of your pieces, maybe you need a stitching pony.
  • If your projects take a lot force to pull your needles through the holes. Maybe you need smaller needles or sharper hole punches.
  • If your edge treatment takes a lot of time, maybe use a rotating tool like a dremel.
If you know what causes the time drain you can get more efficient and focus on the parts that make you fun the most.

8. Watch videos how other people build stuff and learn from them.

A phrase I love: You don’t even know, what you don’t know.

How shall you know that there exists a tool that solves your problem, if you do not know what to search for? There are many great YouTube channels that show how things are build and each and every detail is explained. This is your chance to learn how to build something without wasting material.

At this point, content from the external provider (https://www.youtube-nocookie.com/) is provided. We would like to point out that the content and the processing of your data when clicking on this link are outside our area of responsibility and may no longer be subject to the scope of protection of the General Data Protection Regulation.
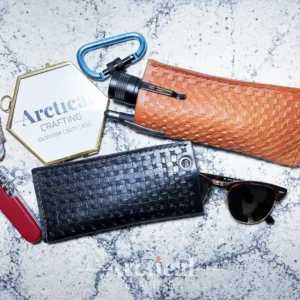
A few channels, that leathercraft beginners can benefit from:

Arctical Crafting
Step by step guides on leather projects and experimental materials with subtitles.
Sorry, we got to list ourself here, we do not want withhold this from you 😜

Corter Leather
Very visual leather projects with great voice over.

Weaver Leather Supply
Professional video production, a compendium and best practices.

Little King Goods
Cinematic and high quality production, ASMR

9. Take pictures. Share your work on social media. Get Feedback.

Start taking pictures of your work. Ever did this in sports? Before and after comparisons are great to motivate yourself and see your progress. It also makes it easier to sell your projects, explain it to your peers, build a portfolio or remember things.

Another advantage is that you can post the images online. The subreddits r/leathercraft or r/sewing are a great place to share your work, ask questions or get feedback and tips. Most users are very kind and helpful. You can ask them for advice on repair, materials, suppliers and improvement.

When you show your new hobby or interest to social media it will soon start to show it back to you. Your Instagram or Pinterest feed will have new inspirations. Even if you do not post on social media, maybe share it in your WhatsApp status.

Your work is like a great book, if you do not advertise it, nobody will find and read it.

10. Checkout the leather goods in your surroundings - high and low quality.

So you did a few beginner leather projects, watched many videos and your work is getting better and better. Ever wondered what your work is worth? It can be really inspiring to checkout some leather goods in your house or in some shops.

What did you pay for that “high quality brand” wallet? Checkout the expensive hand bag of your friend. What costs a weekender in the fashion store? Is it hand sewn (check the stitches)? How about the edges?

It can be hard to charge the same prices as well known brands. But it can be a real confidence boost, when you find your stuff isn’t “actually that bad”. People may not see or care for the mistakes you did – sometimes it is just our perfectionism.

Good luck with your projects. Maybe we so us on Reddit or YouTube.

Our latest products

EDC Pouch

EDC Pouch

This small case is the perfect companion for your everyday life - whether for glasses, pens or folding knife. It offers enough space for quick access to the essentials and your EDC equipment.

Molle Bag

MOLLE Belt Bag & EDC Organizer

This leather bag is something for everyday use. It offers enough storage space for small equipment and 2 tabs for knife or flashlight.

EDC Organizer Red

EDC Organizer

This EDC organizer stows your equipment with style. The red leather with a contrast stripe with abstract design is a real eye-catcher. It offers multiple straps for pens or items with clips.
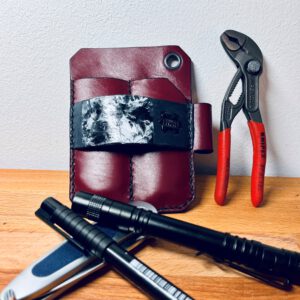
Knife Pouch

Knife Belt Pouch

This knife belt pouch safely stores your knives on your belt, whether Opinel, Böker Speedlock II or other knives. The abstract painting is a unique design.
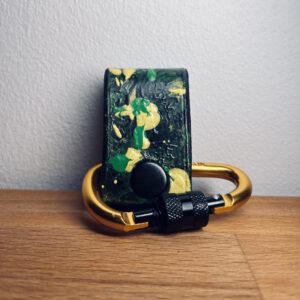
Belt Strap Promo

EDC Belt Clip

This clip keeps keys, gloves or other daily companions safely on the belt. It has a carabiner and a tab with button to have your equipment quickly at hand.
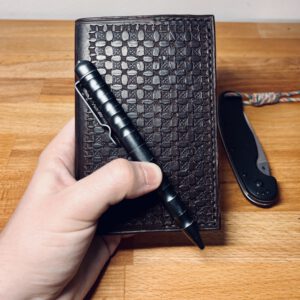
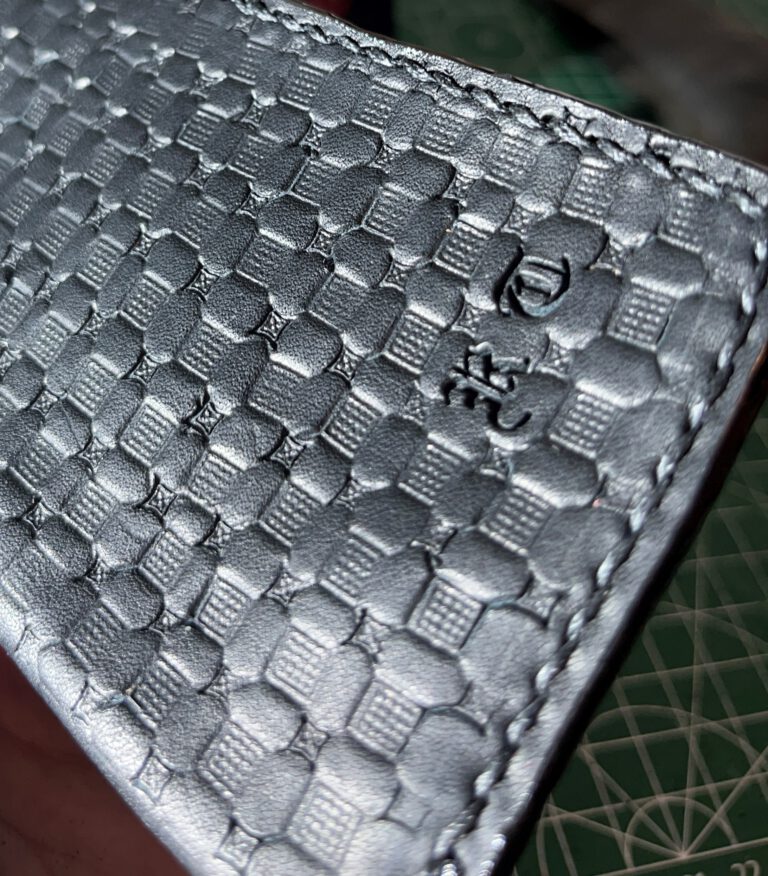
Fieldnotes Cover

Leather Notebook A6

This notebook has a wet embossed pattern on the outside and is a great companion for your everyday life. The inside of the notebook can be easily changed. The cover protects your notes from many external influences and makes a perfect gift.
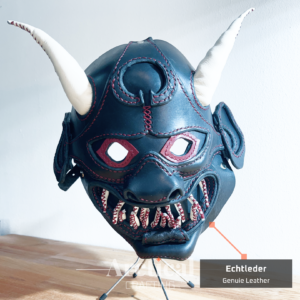
Leder Oni Samurai Maske

Oni Samurai Mask

This hand-sewn leather mask is an absolute eye-catcher and for your next costume on Halloween or for cosplay. It is modeled after a Japanese Oni - a kind of demon or devil.

Leather repair & custom work

We also make personalized or custom leather products upon request. Or are you attached to your favorite piece? We also offer repairs for your leather products. The following products & repairs are possible:

  • Knife sheaths & holsters
  • Bags & wallets
  • Repair of motorcycle clothing & gloves
  • Collars & harnesses for dogs and other animals
  • Armors & helmets for roleplayers or cosplay
  • And many more

This is how it works…

service@arctical-crafting.com